The source code for this article can be found here.
Welcome to another cloud experiment! The idea behind these hands-on tutorials is to provide practical experience building cloud-native solutions of different sizes using AWS services and CDK. We’ll focus on developing expertise in Infrastructure as Code, AWS services, and cloud architecture while understanding both the “how” and “why” behind our choices.
Note: This lab is meant to be studied alongside a companion lab that shows an alternative way of accomplishing the same goal. The introductory section is the same, but it’s worth contrasting the way both stacks are built.
Hosting Containers in a Serverless Environment
Docker (and other container technologies like Podman) are awesome. They make software packaging and deployment much easier, so it’s no surprise that containers have become a common and widely-supported format for sharing and deploying applications. There are many different alternatives for running containers, from full-blown Kubernetes deployments to just running a few containers on a virtual machine, like a small EC2 instance.
AWS lets you do both those things, but it also offers a simplified way of running containers—both on virtual machines and in a serverless environment—through the Elastic Container Service (ECS). In this lab, we’ll learn how to create a simple load-balanced ECS service running on AWS’s serverless container platform, Fargate.
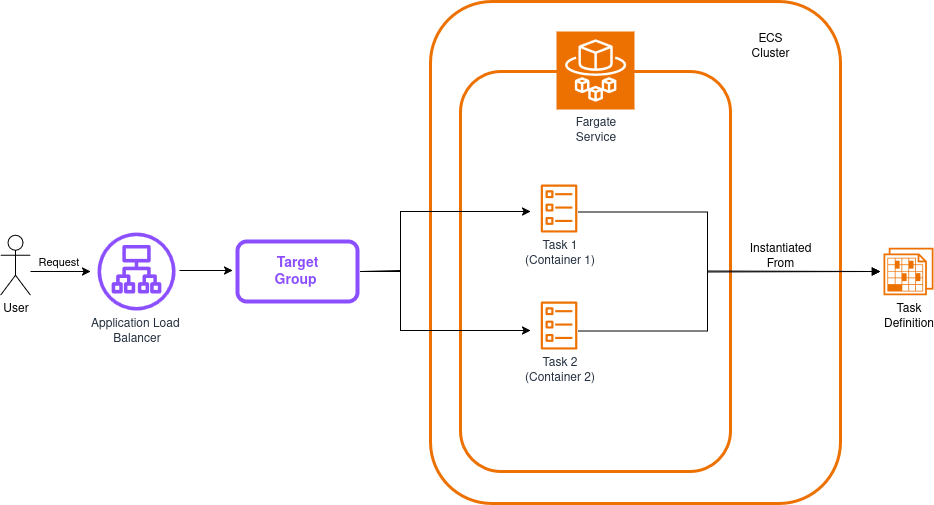
The architecture of our solution will look like this:
Before proceeding, it’s important to review a few relevant concepts, at least at a superficial level:
-
Load Balancer: A component that distributes incoming traffic across multiple targets with the goal of spreading the load evenly across them. We’ll use an Application Load Balancer for this lab, but AWS also provides a Network Load Balancer and the classic load balancer (mostly for legacy uses).
-
Target Group: A collection of resources that receive traffic forwarded by the load balancer. These are usually containers, virtual machines, Lambda functions, or basically almost anything you can attach an IP to. Load balancers can have multiple target groups.
-
ECS Cluster: A collection of computing resources that will serve as the foundation your containers will run on top of. You can either make it an EC2-backed cluster or use the Fargate serverless environment.
-
ECS Fargate Service: A type of service you can add to your cluster that runs in a serverless environment. This service is responsible for ensuring that a given number of tasks of a given type are running in a healthy state within your cluster.
-
ECS Task: Tasks are basically containers. Well, not necessarily, because a single task can have definitions for more than one container (like a container app plus a logging/metrics container running alongside), but you can think of them as containers or collections of containers.
-
ECS Task Definition: This is a blueprint that contains instructions for building your tasks. If you’ve done object-oriented programming, you can think of task definitions as classes and tasks as instances.
Our app will run two tasks (each with a single container) and distribute requests between them to improve resiliency and performance—a common pattern in cloud deployments. The diagram above leaves out the security groups, which block direct access to containers while still allowing the load balancer to forward traffic. Keep in mind that our stack will create these resources automatically.
Great! With a better idea of where everything fits, we’re ready to start building our solution!
Building the Test App
We need an app we can containerize to test our stack—hopefully something simple. We’ll create a small Sinatra application with a single route (the root) and a single view that prints some basic data unique to each container.
Create a folder called app, and within it create a Gemfile with these contents:
source 'https://rubygems.org'
gem 'sinatra'
gem 'rackup'
gem 'puma'
Now we can create the main app file. Next to the Gemfile, create app.rb:
# frozen_string_literal: true

require 'sinatra'

set :port, 4567
set :bind, '0.0.0.0'

get '/' do
  @container_hostname = ENV['HOSTNAME']
  erb :index
end
This file uses a view (index), so the next step is to create a folder named views (within the app folder), and inside it create a file named index.erb:
<!doctype html>
<html lang="en">
<head>
  <meta charset="UTF-8">
  <meta name="viewport" content="width=device-width, initial-scale=1">
  <title>Test Sinatra App</title>
</head>
<body style="font-family: 'Times New Roman';">
  <div style="text-align: center; line-height: 100px;">
    <h2>Test Sinatra App</h2>
    <% if @container_hostname %>
      <p>Serving content from: <%= @container_hostname %></p>
    <% end %>
  </div>
</body>
</html>
Now, the last step is to write a Dockerfile for building our application’s docker image:
# Dockerfile
FROM ruby:3.3
ENV APP_ENV=production
WORKDIR /app
COPY . /app
RUN bundle install
EXPOSE 4567
CMD ["ruby", "app.rb"]
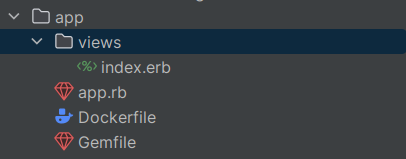
And we’re done! The folder structure should look like this:
You can write the app yourself or just copy it from the lab’s repo. You don’t need to test it locally, but if you want to give it a try, just run the command docker build --tag 'sample-sinatra' . to create the container image, and then run it with docker run -p 8055:4567 sample-sinatra. This will serve the app on your localhost at port 8055, like this:
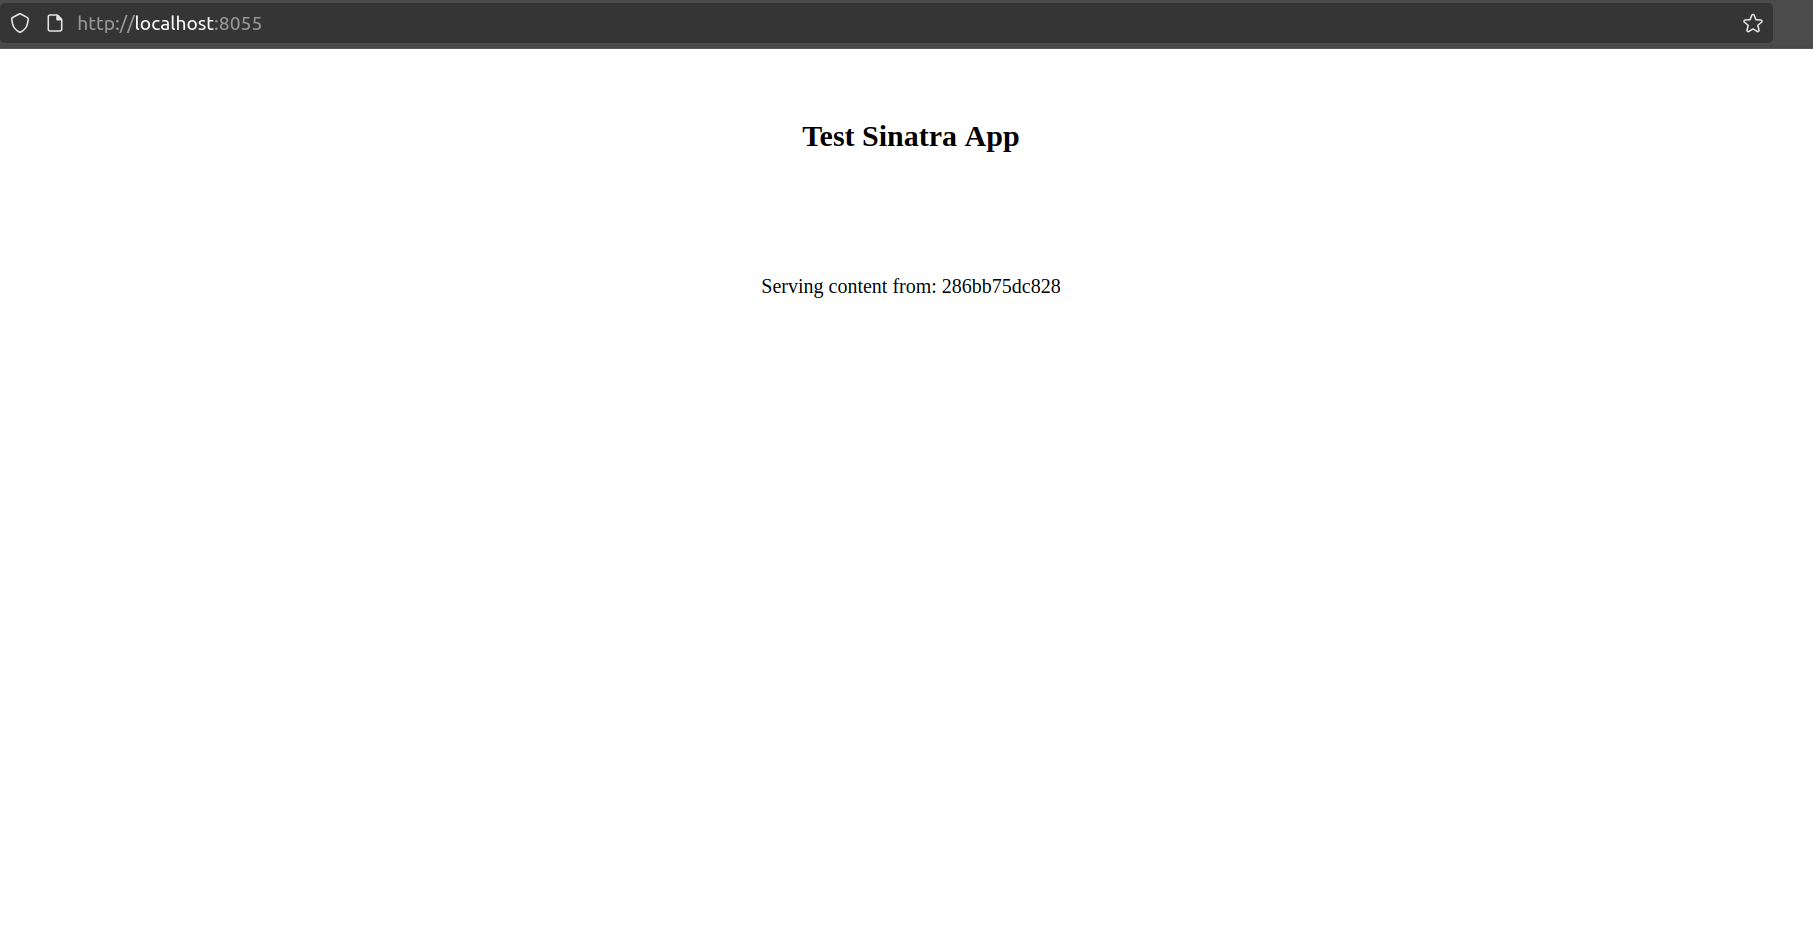
We’re done with the app—now we can focus on the infrastructure.
Building our Stack
Project Creation
First, we need the regular project setup we’ve become accustomed to.
Create an empty folder (I named mine LoadBalancedECSFargateFromPattern) and run cdk init app --language typescript inside it.
This next change is optional, but the first thing I do after creating a new CDK project is head into the bin folder and rename the app file to main.ts. Then I open the cdk.json file and edit the app config:
{
  "app": "npx ts-node --prefer-ts-exts bin/main.ts",
  "watch": {
    ...
  }
}
Now your project will recognize main.ts as the main application file. You don’t have to do this—I just like having a file named main serving as the main app file.
Stack Imports
From looking at the diagram, we know we’ll need the following imports at the top of the stack:
import * as cdk from 'aws-cdk-lib';
import {Construct} from 'constructs';
import {aws_ecs as ecs} from "aws-cdk-lib";
import {aws_ecs_patterns as ecs_patterns} from "aws-cdk-lib";
Create the Stack
Remember all the work we did for building the solution in the companion lab? This time, you can accomplish the very same thing with just the following:
const fargateService = new ecs_patterns.ApplicationLoadBalancedFargateService(
  this,
  "fargateService",
  {
    taskImageOptions: {
      image: ecs.ContainerImage.fromAsset('app'),
      containerPort: 4567,
    },
    desiredCount: 2,
    memoryLimitMiB: 1024,
    minHealthyPercent: 100,
  }
);
That’s it—that’s the whole thing. This will create and configure the same resources we created in the previous lab, with a lot less code! I think it’s useful to have constructs that implement such common patterns, and when possible, always try to go for the simplest, cleanest solution.
Your use case may differ from what’s achievable with these patterns, but it’s much easier to start with a simple solution and gain knowledge about the domain and environment, and then use this knowledge to refine a potentially more complicated solution, than it is to do the opposite.
Testing the Solution
For this one, the testing procedure is the same as the one we followed in the companion lab. You can just repeat the steps we followed there.
IMPORTANT! Always remember to delete your stack by running cdk destroy or deleting it manually in the console.
Improvements and Experiments
-
Check out other patterns, like
ApplicationMultipleTargetGroupsEc2ServiceandQueueProcessingFargateService. Think about which use cases can benefit from these configurations and write your own solutions. -
Like in the other lab, the best and probably most fruitful experiment you can attempt is to use this laboratory as a foundation for containerizing and deploying your own application.
There’s almost always more than one way to achieve a goal, and valuable insights can be gained from exploring different approaches. Each method carries its own strengths and weaknesses, and by studying them, you can better judge which is most likely to align with the complex requirements and constraints of the problem at hand.
I hope comparing these two solutions helps you choose the best approach for your next container-centric project. Or, you could always just toss everything into Kubernetes… and hope for the best.
I hope you find this useful!