The source code for this article can be found here.
Welcome to another cloud experiment! The idea behind these hands-on tutorials is to provide practical experience building cloud-native solutions of different sizes using AWS services and CDK. We’ll focus on developing expertise in Infrastructure as Code, AWS services, and cloud architecture while understanding both the “how” and “why” behind our choices.
Note: This lab is meant to be studied alongside a companion lab that shows an alternative way of accomplishing the same goal. The introductory section is the same, but it’s worth contrasting the way both stacks are built.
Hosting Containers in a Serverless Environment
Docker (and other container technologies like Podman) are awesome. They make software packaging and deployment much easier, so it’s no surprise that containers have become a common and widely-supported format for sharing and deploying applications. There are many different alternatives for running containers, from full-blown Kubernetes deployments to just running a few containers on a virtual machine, like a small EC2 instance.
AWS lets you do both those things, but it also offers a simplified way of running containers—both on virtual machines and in a serverless environment—through the Elastic Container Service (ECS). In this lab, we’ll learn how to create a simple load-balanced ECS service running on AWS’s serverless container platform, Fargate.
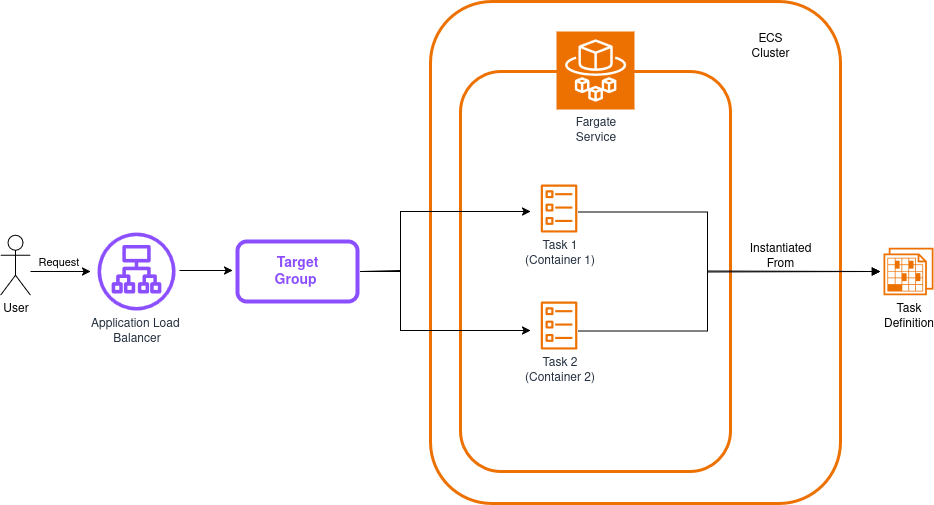
The architecture of our solution will look like this:
Before proceeding, it’s important to review a few relevant concepts, at least at a superficial level:
-
Load Balancer: A component that distributes incoming traffic across multiple targets with the goal of spreading the load evenly across them. We’ll use an Application Load Balancer for this lab, but AWS also provides a Network Load Balancer and the classic load balancer (mostly for legacy uses).
-
Target Group: A collection of resources that receive traffic forwarded by the load balancer. These are usually containers, virtual machines, Lambda functions, or basically almost anything you can attach an IP to. Load balancers can have multiple target groups.
-
ECS Cluster: A collection of computing resources that will serve as the foundation your containers will run on top of. You can either make it an EC2-backed cluster or use the Fargate serverless environment.
-
ECS Fargate Service: A type of service you can add to your cluster that runs in a serverless environment. This service is responsible for ensuring that a given number of tasks of a given type are running in a healthy state within your cluster.
-
ECS Task: Tasks are basically containers. Well, not necessarily, because a single task can have definitions for more than one container (like a container app plus a logging/metrics container running alongside), but you can think of them as containers or collections of containers.
-
ECS Task Definition: This is a blueprint that contains instructions for building your tasks. If you’ve done object-oriented programming, you can think of task definitions as classes and tasks as instances.
Our app will run two tasks (each with a single container) and distribute requests between them to improve resiliency and performance—a common pattern in cloud deployments. The diagram above leaves out the security groups, which block direct access to containers while still allowing the load balancer to forward traffic. Keep in mind that our stack will create these resources automatically.
Great! With a better idea of where everything fits, we’re ready to start building our solution!
Building the Test App
We need an app we can containerize to test our stack—hopefully something simple. We’ll create a small Sinatra application with a single route (the root) and a single view that prints some basic data unique to each container.
Create a folder called app, and within it create a Gemfile with these contents:
source 'https://rubygems.org'
gem 'sinatra'
gem 'rackup'
gem 'puma'
Now we can create the main app file. Next to the Gemfile, create app.rb:
# frozen_string_literal: true

require 'sinatra'

set :port, 4567
set :bind, '0.0.0.0'

get '/' do
  @container_hostname = ENV['HOSTNAME']
  erb :index
end
This file uses a view (index), so the next step is to create a folder named views (within the app folder), and inside it create a file named index.erb:
<!doctype html>
<html lang="en">
<head>
  <meta charset="UTF-8">
  <meta name="viewport" content="width=device-width, initial-scale=1">
  <title>Test Sinatra App</title>
</head>
<body style="font-family: 'Times New Roman';">
  <div style="text-align: center; line-height: 100px;">
    <h2>Test Sinatra App</h2>
    <% if @container_hostname %>
      <p>Serving content from: <%= @container_hostname %></p>
    <% end %>
  </div>
</body>
</html>
Now, the last step is to write a Dockerfile for building our application’s docker image:
# Dockerfile
FROM ruby:3.3
ENV APP_ENV=production
WORKDIR /app
COPY . /app
RUN bundle install
EXPOSE 4567
CMD ["ruby", "app.rb"]
And we’re done! The folder structure should look like this:
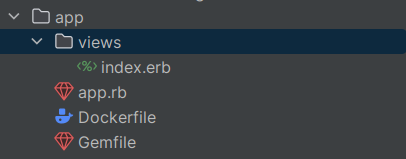
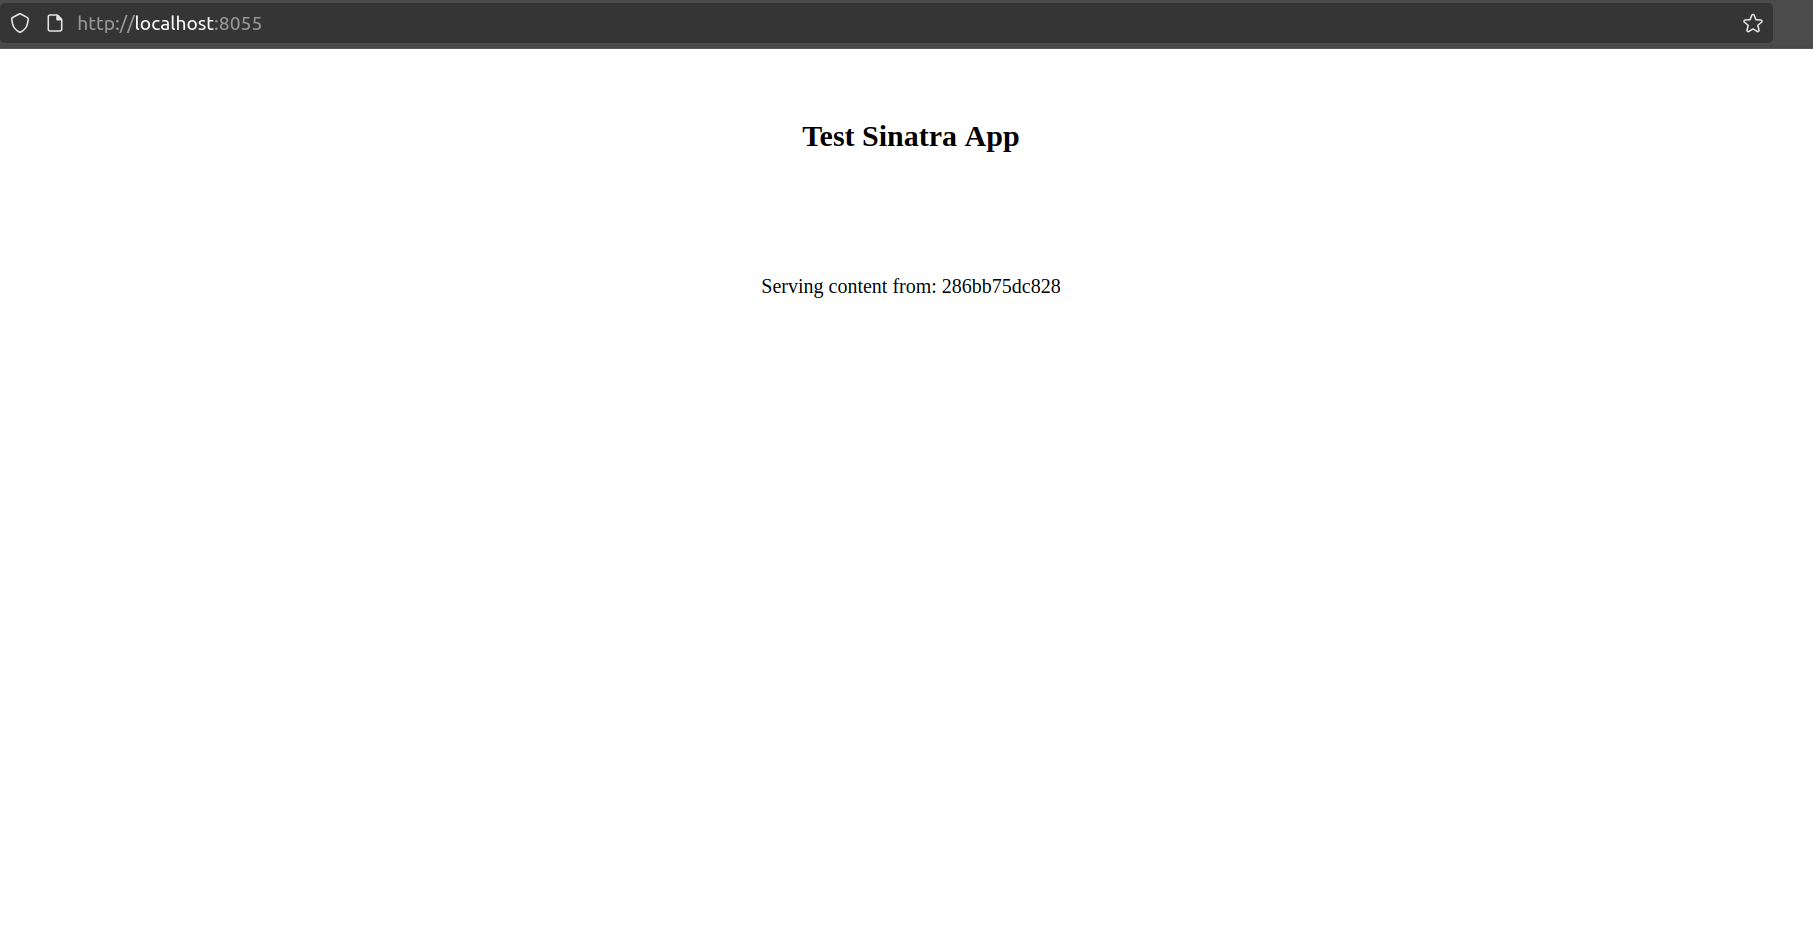
You can write the app yourself or just copy it from the lab’s repo. You don’t need to test it locally, but if you want to give it a try, just run the command docker build --tag 'sample-sinatra' . to create the container image, and then run it with docker run -p 8055:4567 sample-sinatra. This will serve the app on your localhost at port 8055, like this:
We’re done with the app—now we can focus on the infrastructure.
Building our Stack
Project Creation
First, we need the regular project setup we’ve become accustomed to.
Create an empty folder (I named mine LoadBalancedECSFargateFromScratch) and run cdk init app --language typescript inside it.
This next change is optional, but the first thing I do after creating a new CDK project is head into the bin folder and rename the app file to main.ts. Then I open the cdk.json file and edit the app config:
{
  "app": "npx ts-node --prefer-ts-exts bin/main.ts",
  "watch": {
    ...
  }
}
Now your project will recognize main.ts as the main application file. You don’t have to do this—I just like having a file named main serving as the main app file.
Stack Imports
From looking at the diagram, we know we’ll need the following imports at the top of the stack:
import * as cdk from 'aws-cdk-lib';
import {Construct} from 'constructs';
import {aws_ec2 as ec2} from 'aws-cdk-lib';
import {aws_ecs as ecs} from 'aws-cdk-lib';
import {aws_elasticloadbalancingv2 as elbv2} from 'aws-cdk-lib';
Create the Network and Cluster
The first resource we’ll create is the VPC. We’ll make a small VPC with two subnets (public and private) on each of two availability zones. We’ll keep each subnet small (/28), so a /26 network will be enough for hosting the four subnets. The plan is to host the containers in private subnets and keep the load balancer active in both public subnets.
const vpc = new ec2.Vpc(this, "VPC", {
  ipAddresses: ec2.IpAddresses.cidr("10.0.0.0/26"),
  natGateways: 0,
  maxAzs: 2,
  subnetConfiguration: [
    {cidrMask: 28, name: "private-subnet", subnetType: ec2.SubnetType.PRIVATE_WITH_EGRESS},
    {cidrMask: 28, name: "public-subnet", subnetType: ec2.SubnetType.PUBLIC},
  ],
});
Note: Instead of having PRIVATE_ISOLATED private networks, we use PRIVATE_WITH_EGRESS. Our containers will still need outbound access to get the container images from ECR
The next step is to create the cluster we’ll add our services and tasks to. The only parameter we need to pass is the VPC we just created:
const cluster = new ecs.Cluster(this, "cluster", {
  vpc: vpc
});
Create the Task Definition
By now, the app folder should be sitting alongside your bin and lib folders.
The first thing we need to ensure is that our task will have enough resources to run properly. We’ll create a simple task definition that assigns 1GB of RAM to the task and half a virtual CPU (512 equals 0.5 vCPU). The app is super simple and this is probably overkill, but it’s a good starting point. Fargate will ensure that our containers have access to the resources they need, so we don’t have to worry about the underlying compute layer and can just offload the responsibility to AWS.
const taskDefinition = new ecs.FargateTaskDefinition(this, 'taskDefinition', {
  memoryLimitMiB: 1024,
  cpu: 512,
})
Now, we add a container to the task. The image will come from our local assets, so we use ecs.ContainerImage.fromAsset, and then, because our app is serving content on port 4567, we need to expose that port.
const appContainerTD = taskDefinition.addContainer("appContainer", {
  image: ecs.ContainerImage.fromAsset("app"),
  logging: ecs.LogDrivers.awsLogs({ streamPrefix: "App" }),
});

appContainerTD.addPortMappings({
  containerPort: 4567
});
Note: You may have noticed that addContainer can receive a portMappings property directly, but when working with Fargate you’ll need to pass the port mappings with an additional call to addPortMappings, because passing them directly in the constructor doesn’t work.
This is enough information to ensure our container will be properly built and uploaded to ECR when we deploy our stack. Now let’s switch our attention to the Fargate service.
Create the Fargate Service
We add the cluster and task definition to our Fargate service during creation, then we set the desired task count. In this case, 2 tasks should be running in a healthy state to consider the deployment healthy, so we’ll set the minimum healthy percentage to 100%.
We also want to deploy our containers in private subnets, so we need to specify that information at the service level. With all this in mind, we can proceed to create our service like this:
const fargateService = new ecs.FargateService(this, 'fargateService', {
  cluster,
  taskDefinition,
  desiredCount: 2,
  minHealthyPercent: 100,
  vpcSubnets: { subnetType: ec2.SubnetType.PRIVATE_WITH_EGRESS },
});
Create and Configure the Load Balancer
The final step is to build an application load balancer and ensure it targets our containers. The first thing is to create the application load balancer. We want it to have an internet-routable address, so we’ll pass the following properties:
const appLB = new elbv2.ApplicationLoadBalancer(this, 'LB', {
  vpc,
  internetFacing: true
});
The final step is to add a listener and create the target group, ensuring requests are sent to our containers on the right port. This will be the responsibility of the service, so we need to pass the following properties to the addListener and addTargets functions:
const listener = appLB.addListener('serviceListener', {
  port: 80,
});

listener.addTargets("ECS", {
  port: 80,
  targets: [
    fargateService.loadBalancerTarget({
      containerName: appContainerTD.containerName,
      containerPort: 4567,
    }),
  ],
  healthCheck: {
    path: "/",
  },
});
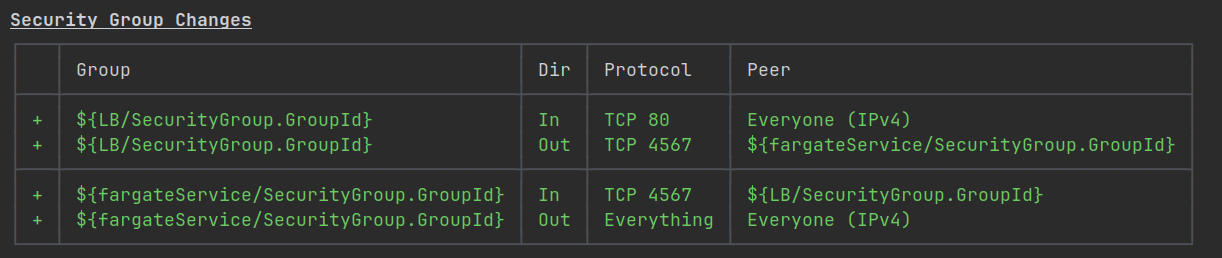
The good thing about this setup is that it will keep your compute running on private networks and just place the load balancer in public subnets. The security groups will also be automatically created to allow access only on the right ports and from the right entities:
We’re almost done! The last, optional, construct we can add is a CloudFormation output to see the URL of the load balancer after deployment, making our lives just a tiny bit easier:
new cdk.CfnOutput(this, "Load Balancer URL", { value: appLB.loadBalancerDnsName });
Testing the Solution
After running cdk deploy, you can visit the URL given back at the end of the stack’s deployment. You’ll get a view that looks more or less like this:
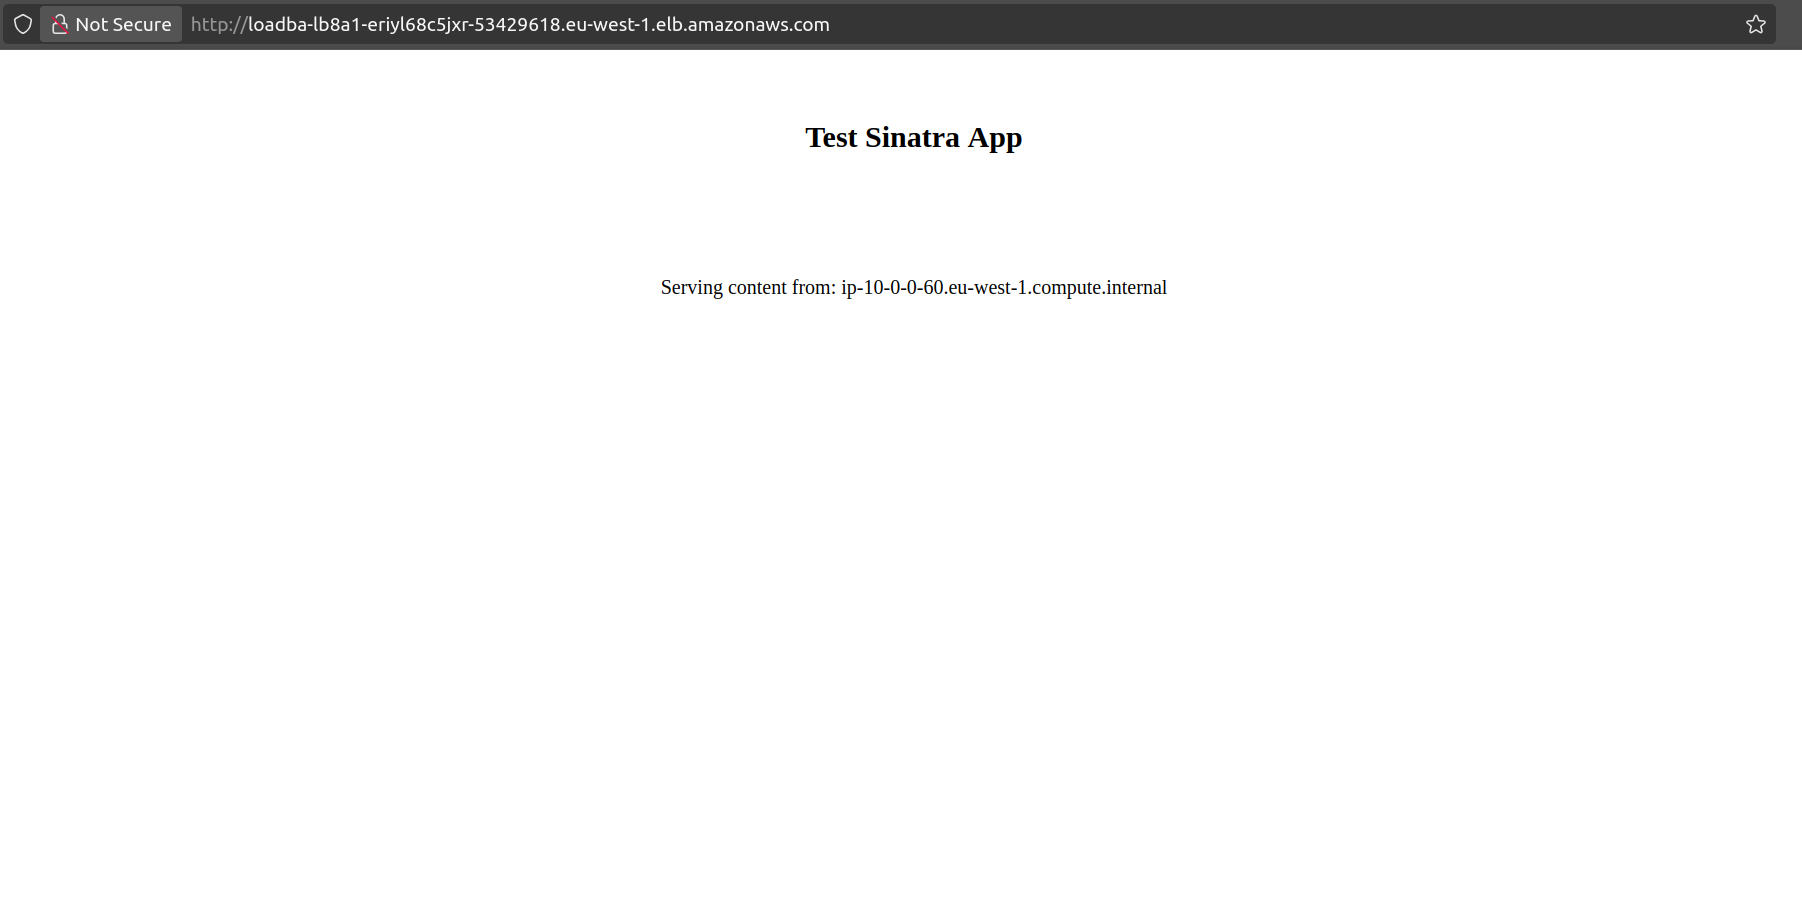
Because the load balancer will split requests between both containers, reloading the page will update the value after the Serving content from string. So, you can get a view with the value 10-0-0-60.eu-west-1.compute.internal and then another one that says 10-0-0-20.eu-west-1.compute.internal.
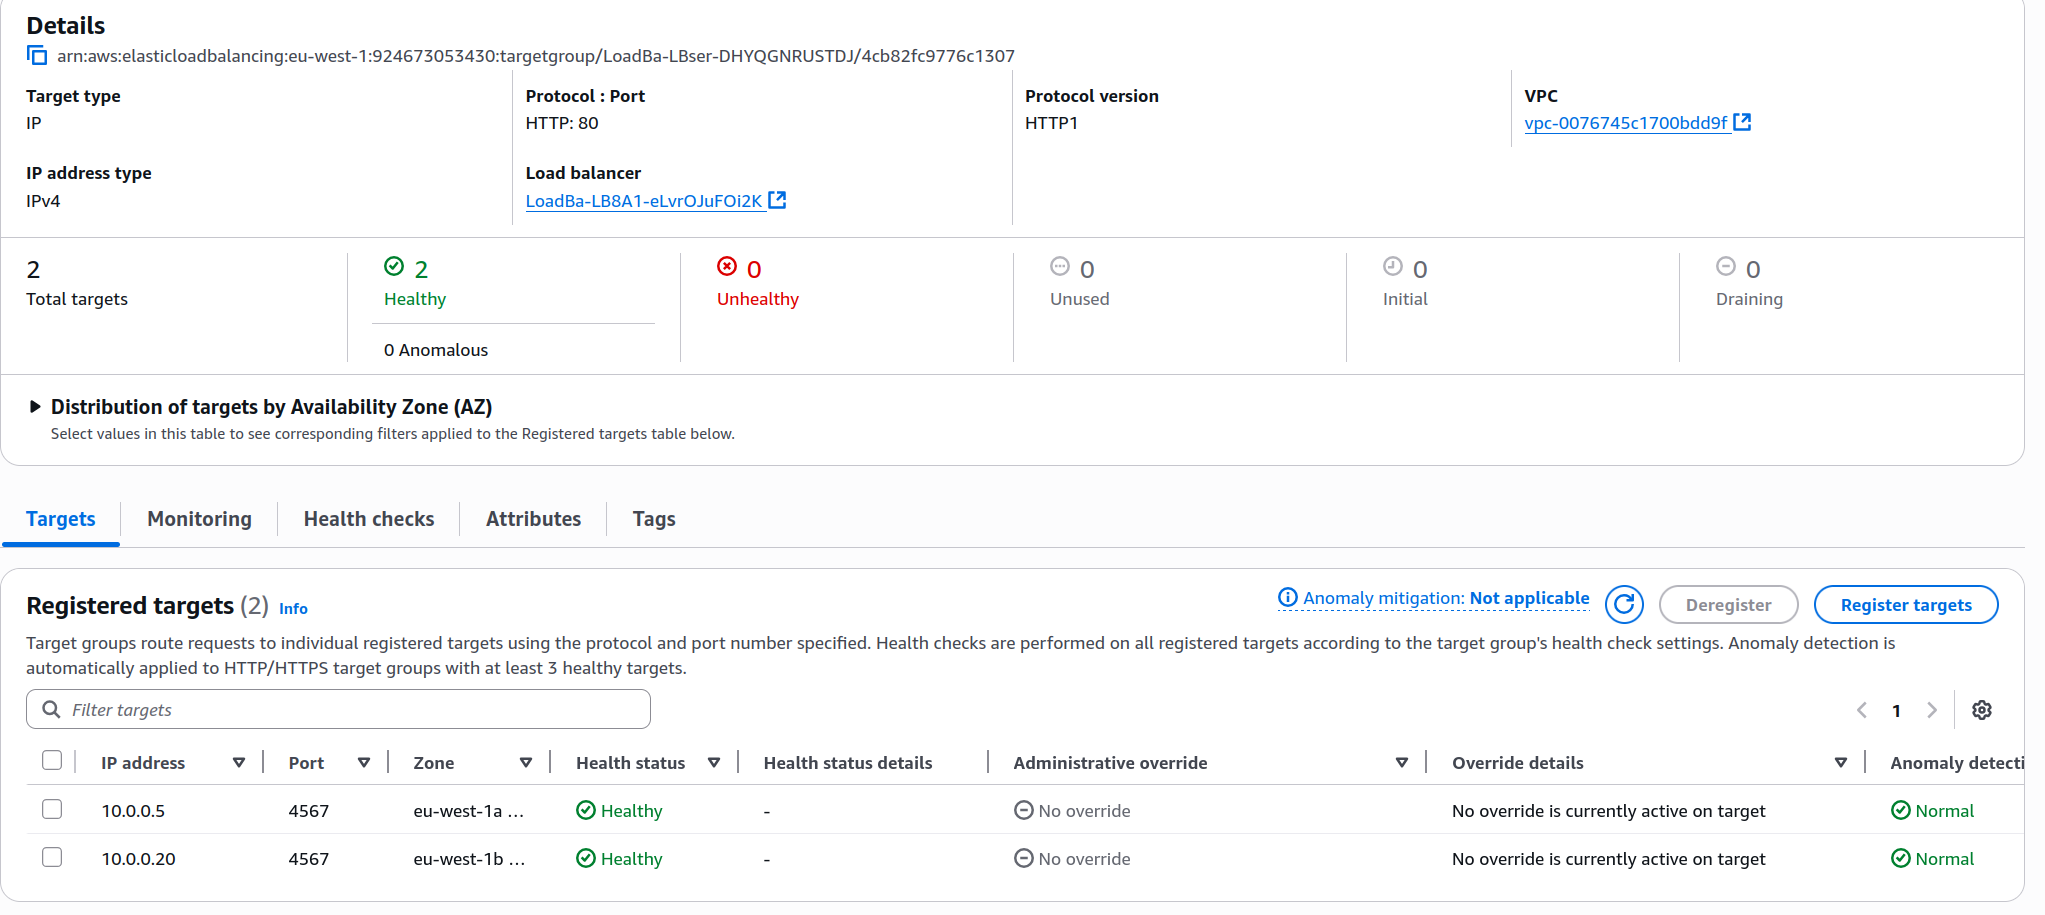
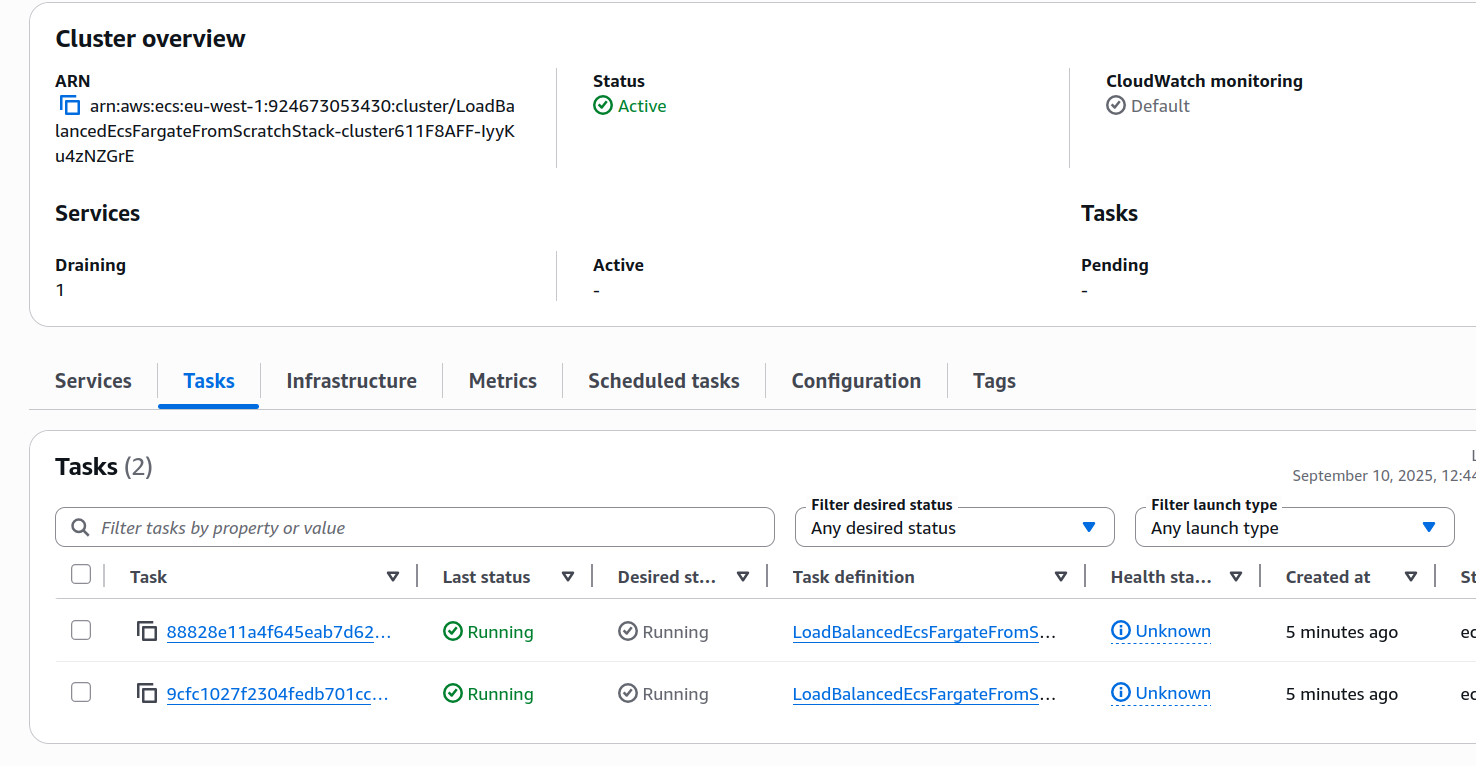
Another thing you can do is inspecting the ECS panel and the target group page, where you can find that your service is already running. There, you can inspect and verify that both tasks are running and in a healthy state:
IMPORTANT! Always remember to delete your stack by running cdk destroy or deleting it manually in the console.
Improvements and Experiments
- Instead of using Fargate, try to run the same container load on a service backed by EC2 instances.
- Is there a way to keep all private subnets isolated, while still granting access to ECR from within those subnets?
- Improve the health check for our containers, it’s currently not working very well.
- The best and probably most fruitful experiment you can attempt is to use this laboratory as a foundation for containerizing and deploying your own application. An application with a single type of container is good enough, but something that involves several different containers working together to accomplish a task can be an even more fruitful experiment (like deploying your own ELK stack).
ECS is very useful and easy to use, and with Fargate as an option that abstracts away a lot of the operational overhead by letting you run your containers in a serverless environment, you can focus even more of your time on building more fun projects.
If you haven’t, take a look at the companion lab, you will learn a much easier way of building the solution we just made.
I hope you find this useful!